kikita & Maps

GIS,spatial and artificial intellegence learning and share

​ CityEngine 中的Map Layer可以参与到批量建模当中,根据角色的不同可以分为Terrain,Texture,Obstacle,Mapping,Function几个类型的图层。

Terrain Map Layer

​ 顾名思义,用于表示场景的地表结构和底图图层,这个图层可以由一个DEM和一个影像共同构成。 这类图层在创建的时候,可以设置影像取值的通道、高程的拉伸范围、影像的尺寸、锚点位置、偏移量等参数。

​ 在图层创建之后,我们可以看到属性窗口中,有这样一段代码表述了上面的一些设置:

1
attr elevation = map_01(brightness, 0.0, 150.0) + elevationDelta

这时,有个疑问,elevationDelta 是什么?如何体现出来的?带着这个疑问我们来看看CE对于场景高程的作用机制。

导入CE场景中的道路线数据一般被识别为Graph Segment,静态模型一般为Static Shape,这两种类型数据可以通过 Align graph to terrain,Align shapes to terrain 来向地形数据对齐。在实际应用中,很多建筑物或道路的底面是个平面,需要将地形整平到与模型底面完美贴合,这时再使用工具 Align terrain to shape 来解决这个问题。

这时保存场景,在CE的工程目录的data文件夹下,就会出现一个场景同名的文件夹,并在其下自动生成一个16bit的栅格数据,储存地形变化量,这个栅格数据即为 elevationDelta。当预览数据时,从渲染方案上可以得到直观印象,灰色为无变化,黑色为减低,白色为增加。

在开始如下部署之前,一定要注意下版本对应的情况,否则会部署失败:

版本
Portal 10.6 Portal 10.5.1 Portal 10.5 Portal10.4.1
Pro 2.1 LM 10.6 不支持 不支持 不支持
Pro 2.0 LM 10.6 LM 10.5.1、10.6 LM 10.5.1、10.6 不支持
Pro 1.4 LM 10.6 LM 10.5.1、10.6 LM 10.5、10.5.1、10.6 LM 10.4.1

LM : License Manager, Portal: Portal for ArcGIS; Pro: ArcGIS Pro


如果您购买并已经部署了 Portal for ArcGIS,搭建了您的组织门户, 并且您希望在内网环境中通过 Named User 方式使用 ArcGIS Pro,那么您可以选择通过Portal for ArcGIS为组织成员配置Named User许可的方式。

1 为组织配置 ArcGIS Pro 许可

1) 首先您需要确定哪个组织门户将用于管理ArcGIS Pro的许可(这个指定的组织门户称为“许可门户”), 尤其当您的组织有多个门户的时候,请确保您指定的门户是您想要用来管理许可的那个门户。此种许可模式,需要安装ArcGIS License Server Administrator 程序。

2) 完成安装后,打开 ArcGIS License Server Administrator,并单击“计算机 ID…” 按钮。

3) 复制并保存计算机标识符对话框中的 MAC 地址

  • 例如,005056a700c7(您需要向 My Esri 提供此信息)。 如果该对话框中存在两个 MAC 地址,则只复制其中之一。

  1. 请记录上一步中您的Mac地址,并且提供您以下信息之一(用户ID、合同编号、用户单位全称),致电易智瑞(中国)信息技术有限公司合同部,为您生成可用于配置许可门户的文件(*.lic)。
    联系电话: 010-5673228,拨0,转合同部。

  2. 当您收到合同部发送的文件 (*.lic)之后, 将其保存到前面安装了 ArcGIS License Server Administrator 的计算机可访问的目录中。

  3. 打开 ArcGIS License Server Administrator 并启动许可服务(如果未运行)。 单击“授权”选项卡,选择“版本”下拉对话框中的“命名用户/Named User”并单击“立即授权”按钮。

  1. 选择“我已收到来自 Esri 的授权文件,现在准备完成授权过程。”,然后浏览至许可 (.lic) 文件, 单击“打开”。

  2. 单击“下一步”。随即显示一个对话框,表明已应用Named User许可。单击“确定”。对话框可能会显示几秒钟,这表示正在重新读取许可。

  3. 单击“可用性”选项卡,并从右上角下拉对话框中选择“命名用户/Named User”。确认显示了预期授权。列出的总数将是Named User实际数量的3倍,这是因为每个Named User 最多允许同时在3个设备上运行 ArcGIS Pro 。

  4. 生成门户配置文件。单击“授权”选项卡,然后单击“生成…”,并将门户配置文件 (.json) 保存到对 Portal for ArcGIS 可见的位置。

随即会显示一个对话框,表明已在您指定的位置生成了文件。单击“确定”并关闭 ArcGIS License Server Administrator。

  1. 打开Web浏览器, 并以组织中默认管理员角色成员的身份登录到 ArcGIS Portal Directory。URL 地址格式为: https://portal.domain.com:7443/arcgis/portaladmin 您登录的门户将成为组织的许可门户。

  2. 单击“系统” > “许可” > “导入授权”。

  1. 单击“浏览”并选择先前生成的门户配置文件 (.json)。确保应用程序下拉菜单被设为 ArcGIS Pro。

14)单击“导入”,您的组织现在已配置了 ArcGIS Pro 许可。

2 组织管理员配置ArcGIS Pro许可

本节的配置方法与 ArcGIS Online 组织管理员配置 ArcGIS Pro 许可的方法相似。
注意:
从 ArcGIS 10.5 版本之后,您只能为达到成员资格级别 2 级的门户成员配置 ArcGIS Pro 许可。

3 登录并使用ArcGIS Pro

  1. 启动 ArcGIS Pro。
    如果 ArcGIS Pro 已打开,请登出,关闭程序,然后重新启动。只能在首次启动 ArcGIS Pro 时连接至许可门户。

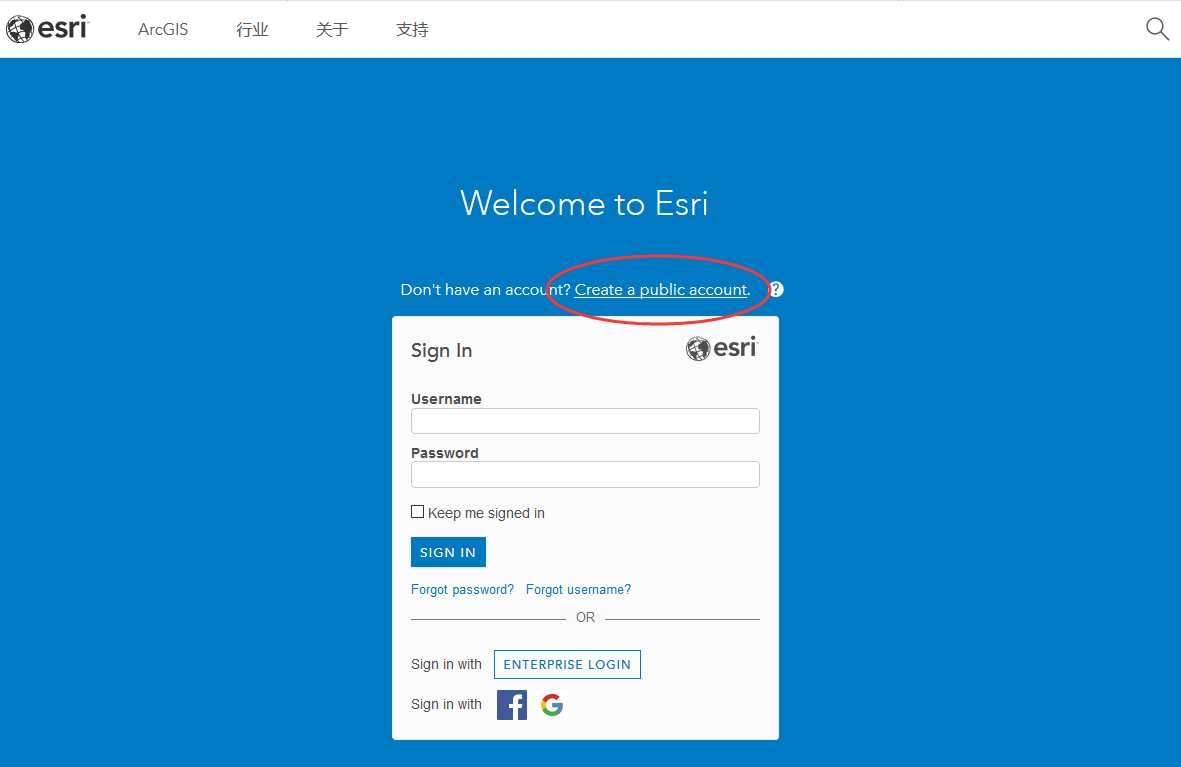
  2. 在 ArcGIS Pro的启动界面中,点击“About ArcGIS Pro”。

  1. 在“Licensing”页面中,点击 “Configure your licensing options”。

  1. 输入许可门户的 URL,如https://webadaptor.domain.com/arcgis。

  1. 单击“OK”。稍后,在登录页面中输入账号密码登录并使用ArcGIS Pro。

主题安装

Maupassant 主题
安装主题和渲染器:

1
2
3
4
$ git clone https://github.com/tufu9441/maupassant-hexo.git themes/maupassant
$ npm install hexo-renderer-pug --save
$ npm install hexo-renderer-sass --save

编辑Hexo目录下的 _config.yml,将theme的值改为maupassant

功能配置

默认配置:

1
2
3
4
5
6
7
8
9
10
11
12
13
14
15
16
17
18
19
20
21
22
23
24
25
26
27
28
29
30
31
32
33
34
35
36
37
38
39
40
41
42
43
44
45
46
47
48
49
50
51
52
53
54
55
56
57
58
59
60
61
62
63
64
65
66
67
68
69
70
71
72
73
74
75
76
77
78
79
80
81
82
83
84
85
86
87
88
89
90
91
92
93
94
95
96
97
_config.yml_config.ymlfancybox: true ## If you want to use fancybox please set the value to true.
disqus: ## Your disqus_shortname, e.g. username
gitment:
enable: false ## If you want to use Gitment comment system please set the value to true.
owner: ## Your GitHub ID, e.g. username
repo: ## The repository to store your comments, make sure you're the repo's owner, e.g. imsun.github.io
client_id: ## GitHub client ID, e.g. 75752dafe7907a897619
client_secret: ## GitHub client secret, e.g. ec2fb9054972c891289640354993b662f4cccc50
uyan: ## Your uyan_id. e.g. 1234567
livere: ## Your livere data-uid, e.g. MTAyMC8zMDAxOC78NTgz
changyan: ## Your changyan appid, e.g. cyrALsXc8
changyan_conf: ## Your changyan conf, e.g. prod_d8a508c2825ab57eeb43e7c69bba0e8b
valine: ## https://valine.js.org
enable: false ## If you want to use Valine comment system, please set the value to true.
appid: ## Your LeanCloud application App ID, e.g. pRBBL2JR4N7kLEGojrF0MsSs-gzGzoHsz
appkey: ## Your LeanCloud application App Key, e.g. tjczHpDfhjYDSYddzymYK1JJ
notify: false ## Mail notifier, see https://github.com/xCss/Valine/wiki/Valine-评论系统中的邮件提醒设置
verify: false ## Validation code.
placeholder: Just so so ## Comment box placeholders.
avatar: 'mm' ## Gravatar type, see https://github.com/xCss/Valine/wiki/avatar-setting-for-valine
pageSize: 10 ## Number of comments per page.
guest_info: nick,mail,link ## Attributes of reviewers.

google_search: true ## Use Google search, true/false.
baidu_search: false ## Use Baidu search, true/false.
swiftype: ## Your swiftype_key, e.g. m7b11ZrsT8Me7gzApciT
tinysou: ## Your tinysou_key, e.g. 4ac092ad8d749fdc6293
self_search: false ## Use a jQuery-based local search engine, true/false.
google_analytics: ## Your Google Analytics tracking id, e.g. UA-42425684-2
baidu_analytics: ## Your Baidu Analytics tracking id, e.g. 8006843039519956000
show_category_count: false ## If you want to show the count of categories in the sidebar widget please set the value to true.
toc_number: true ## If you want to add list number to toc please set the value to true.
shareto: false ## If you want to use the share button please set the value to true, you must have hexo-helper-qrcode installed.
busuanzi: false ## If you want to use Busuanzi page views please set the value to true.
widgets_on_small_screens: false ## Set to true to enable widgets on small screens.
canvas_nest:
enable: false ## If you want to use dynamic background please set the value to true, you can also fill the following parameters to customize the dynamic effect, or just leave them blank to keep the default effect.
color: ## RGB value of the color, e.g. "100,99,98"
opacity: ## Transparency of lines, e.g. "0.7"
zIndex: ## The z-index property of the background, e.g. "-1"
count: ## Quantity of lines, e.g. "150"
donate:
enable: false ## If you want to show the donate button after each post, please set the value to true and fill the following items according to your need. You can also enable donate button in a page by adding a "donate: true" item to the front-matter.
github: ## GitHub URL, e.g. https://github.com/Kaiyuan/donate-page
alipay_qr: ## Path of Alipay QRcode image, e.g. /img/AliPayQR.png
wechat_qr: ## Path of Wechat QRcode image, e.g. /img/WeChatQR.png
btc_qr: ## Path of Bitcoin QRcode image, e.g. /img/BTCQR.png
btc_key: ## Bitcoin key, e.g. 1KuK5eK2BLsqpsFVXXSBG5wbSAwZVadt6L
paypal_url: ## Paypal URL, e.g. https://paypal.me/tufu9441

menu:
- page: home
directory: .
icon: fa-home
- page: archive
directory: archives/
icon: fa-archive
- page: about
directory: about/
icon: fa-user
- page: rss
directory: atom.xml
icon: fa-rss

widgets: ## Six widgets in sidebar provided: search, category, tag, recent_posts, rencent_comments and links.
- search
- category
- tag
- recent_posts
- recent_comments
- links

links:
- title: site-name1
url: http://www.example1.com/
- title: site-name2
url: http://www.example2.com/
- title: site-name3
url: http://www.example3.com/

timeline:
- num: 1
word: 2014/06/12-Start
- num: 2
word: 2014/11/29-XXX
- num: 3
word: 2015/02/18-DDD
- num: 4
word: More

# Static files
js: js
css: css

# Theme version
version: 0.0.0

  • fancybox - 是否启用Fancybox图片灯箱效果
  • disqus - Disqus评论 shortname
  • gitment - Gitment评论相关参数
  • uyan - 友言评论 id
  • livere - 来必力评论 data-uid
  • changyan - 畅言评论 appid
  • valine - Valine评论相关参数
  • google_search - 默认使用Google搜索引擎
  • baidu_search - 若想使用百度搜索,将其设定为true
  • swiftype - Swiftype 站内搜索key
  • tinysou - 微搜索 key
  • self_search - 基于jQuery的本地搜索引擎,需要安装hexo-generator-search插件使用。
  • google_analytics - Google Analytics 跟踪ID
  • baidu_analytics - 百度统计 跟踪ID
  • show_category_count - 是否显示侧边栏分类数目
  • toc_number - 是否显示文章中目录列表自动编号
  • shareto - 是否使用分享按鈕,需要安装hexo-helper-qrcode插件使用
  • busuanzi - 是否使用不蒜子页面访问计数
  • widgets_on_small_screens - 是否在移动设备屏幕底部显示侧边栏
  • canvas_nest - 是否使用canvas动态背景
  • donate - 是否启用捐赠按钮
  • menu - 自定义页面及菜单,依照已有格式填写。填写后请在source目录下建立相应名称的文件夹,并包含index.md文件,以正确显示页面。导航菜单中集成了FontAwesome图标字体,可以在这里选择新的图标,并按照相关说明使用。
  • widgets - 选择和排列希望使用的侧边栏小工具。
  • links - 友情链接,请依照格式填写。
  • timeline - 网站历史时间线,在页面front-matter中设置layout: timeline可显示。
  • Static files - 静态文件存储路径,方便设置CDN缓存。
  • Theme version - 主题版本,便于静态文件更新后刷新CDN缓存。

主题特性

网站图标

若要设置网站Favicon,可以将 favicon.ico 放在Hexo根目录的source文件夹下,建议的大小:32px*32px。

若要为网站添加苹果设备图标,请将命名为 apple-touch-icon.png 的图片放在同样的位置,建议的大小:114px*114px。

文章摘要

首页默认显示文章摘要而非全文,可以在文章的front-matter中填写一项description:来设置你想显示的摘要,或者直接在文章内容中插入<!--more-->以隐藏后面的内容。
若两者都未设置,则自动截取文章第一段作为摘要。

添加页面

source目录下建立相应名称的文件夹,然后在文件夹中建立index.md文件,并在index.mdfront-matter中设置layout为layout: page。若需要单栏页面,就将layout设置为 layout: single-column

文章目录

在文章的front-matter中添加toc: true即可让该篇文章显示目录。

文章评论

文章和页面的评论功能可以通过在front-matter中设置comments: truecomments: false来进行开启或关闭(默认开启)。

语法高亮

要启用代码高亮,请在Hexo目录的_config.yml中将highlight选项按照如下设置:

1
2
3
4
5
6
highlight:
enable: true
auto_detect: true
line_number: true
tab_replace:

数学公式

要启用数学公式支持,请在Hexo目录的_config.yml中添加:

1
2
mathjax: true

并在相应文章的front-matter中添加mathjax: true,例如:

1
2
3
4
5
6
title: Test Math
date: 2016-04-05 14:16:00
categories: math
mathjax: true
---

数学公式的默认定界符是$$...$$\\[...\\](对于块级公式),以及$...$\\(...\\)(对于行内公式)。

但是,如果你的文章内容中经常出现美元符号“$”, 或者说你想将“$”用作美元符号而非行内公式的定界符,请在Hexo目录的_config.yml中添加:

1
2
mathjax2: true

而不是mathjax: true。 相应地,在需要使用数学公式的文章的front-matter中也添加mathjax2: true

示例

主题效果主题效果

转自:屠城: 大道至简——Hexo简洁主题推荐

我们可以通过工具 Generate Map Server Cache Tiling Scheme 来生成自定义的切片方案,无论是ArcMap还是ArcGIS Pro ,无论是栅格切片还是矢量切片,都屡试不爽。

前段时间,为了方便 ArcGIS Pro 的自动化工作,我尝试用python调用这个功能,然而后面在使用其生成的切片方案(.xml)文件时,会发现切片原点总是默认值,例如地理坐标系统下是“-400,400”。

1
2
3
<TileOrigin xsi:type="typens:PointN">
<X>-400</X><Y>400</Y>
</TileOrigin>

arcpy.GenerateMapServerCacheTilingScheme_server (in_map, tile_origin, output_tiling_scheme, num_of_scales, scales, dots_per_inch, tile_size) 中,tile_origin这个参数标识为point对象,可是无论如何传参都无效。

这样会导致切片创建以及更新的一系列问题,在当时也是排查了很久才定位到这个问题。我的是测试环境是 ArcGIS Pro 2.0.x。值得欣慰的是,这个问题在 ArcMap的arcpy中没有问题,可以正确识别参数。

经过与esri美国工程师的沟通确认,此问题为arcpy for ArcGIS Pro的bug,暂时没有官方解决方法。

  • BUG-000110503 : Changing the tile origin parameter when using arcpy.server.GenerateMapServerCacheTilingScheme does not actually change the tile origin

绕行办法:

既然xml已经生成了,只有切片原点信息是错误,那就自己来解析xml修改对应参数即可。在自己的脚本中额外增加一个解析xml的逻辑吧,跳过这个坑。

1
2
3
4
5
6
7
8
9
10
11
12
13
14
15
import xml.dom.minidom as DOM
# Modify Scheme File to Avoid the tile_Origin Specification Bug of the Pro Tool
def modifyTilingSchemeFile(tileScheme,x_origin,y_origin):
try:
doc = DOM.parse(tileScheme)
tileOriginX = doc.getElementsByTagName('X')
tileOriginY = doc.getElementsByTagName('Y')
tileOriginX[0].firstChild.data = x_origin
tileOriginY[0].firstChild.data = y_origin
f = open(tileScheme, 'w+')
doc.writexml(f)
f.close()
return True
except:
arcpy.AddMessage("tile scheme XML file does not exist.")

​ 这篇是读书笔记。同事手里有本《面向ArcGIS的Python脚本编程》,系统的介绍了如何结合ArcGIS使用python。最近拿来阅读,觉得受益颇多。最早期我是通过python自身的学习资源、书籍、ArcGIS帮助文档入门的,知识体系虽然建立起来了,但是很多细节没有考虑到,对照书中的内容温故知新、查漏补缺。

arcpy与AO

​ 书的开篇就介绍了脚本语言和程序语言的区别。我将其引申到日常工作中用户会经常问到的,“为什么AO可以实现的东西,arcpy却不能?”“为什么arcpy的功能这么‘粗粒度’?”

​ AO中包含了ArcGIS用到的所有编程对象,包含了数以千计的不同对象,因此程序员可以精细控制软件的外观和运行机制。Python作为一种非常平易近人的语言,既是脚本语言又是程序语言,在ArcGIS平台中,python更多充当的是脚本语言的角色,例如:访问ArcGIS现有的功能,组合各种现有功能来扩展ArcGIS的功能,更可以作为一种“粘合剂”将更多的功能整合进来。用书中的话讲,脚本语言就是在“控制其他应用程序以实现任务自动化”。arcpy是ArcGIS提供的python站点包,用于访问ArcGIS 的地理处理功能,定位正在于此。

arcpymodel builder

​ model builder(简称MB吧)是ArcGIS Desktop中我认为最可爱的功能没有之一,它采用了编程的思想却免去了书写代码,是给非程序员实践创造的启航之地。日常工作中,很多逻辑简单、功能清晰的任务都可以使用MB实现。以前写过一篇,《如何在ArcGIS for Desktop中实现批量任务》,具体不再展开。你可能由这些疑问,“MB也能完成批量任务,我何时应该考虑使用python?” 当然这里回答的是“不得不”的问题,如果你本来就是编程高手,从一开始就会觉得MB限制了你的想象力,如下回答可能不需要考虑。

​ MB的局限性有什么?或者说相比之下,python能更多实现什么?

  • python可以实现更高级的编程逻辑。例如嵌套循环是MB的软肋,一遇到多重遍历之类的任务就只能呵呵了。
  • python可以实现更底层的处理任务。例如我们可以使用Cursor,遍历表并对其增删改等等。
  • python可以集成第三方的资源。例如R语言等第三方类库来处理数据执行任务。
  • python可以不在ArcGIS软件内部执行任务,只需要安装并授权ArcGIS软件,然后通过独立脚本的形式运行。既然可以独立运行,就可以定义系统任务定时执行。

python基础

命名规范

​ 这本书中也提到了命名规范的内容,这是我在初期没有考虑到的问题。随着时间的推移和协同工作的需要,渐渐发现这是个非常重要的内容,大型的科技公司会更重视这个方面。编程和写文章一样,仅仅懂得一种语言的语法、词汇是不足够的,更重要的是如何将文章写的清晰优雅,对应到代码中就是简洁高效。python的官方命名规范:Style Guide for Python Code,它是PEPs(Python Enhancement Proposals)中的一部分。

​ 变量名及脚本文件名:

  • 变量名以字母开头,不能使用特殊字符开头
  • 全部使用小写字母
  • 必要的时候使用下划线,增加代码可读性
  • 使用描述性变量,避免使用俚语或缩写
  • 变量名尽量简短

​ 缩进:

  • 建议使用四个空格表示缩进
  • 不要同时使用tab和空格进行缩进

​ 注释:

  • 建议每个功能块都有相关注释
  • 每个脚本工具或函数文件前需要有个头文件,应该包含脚本文件名、功能介绍、运行要求、作者、开发时间等信息。

从脚本外部输入参数

​ 使用系统参数 sys.agv 。系统参数sys.argv[0]存储的是脚本自身的地址,因此额外的系统参数是从1开始。

1
2
3
4
5
# This is content of testInputPara.py.
import sys
x = int(sys.argv[1])
y = int(sys.argv[2])
print(x*y)

​ 在命令行中执行:

1
2
D:\ForTempTest>python testInputPara.py 2 8
16

​ 在交互式python编译器中使用 input(),可以接收用户输入。

1
2
3
4
>>> x = input("")
bingo
>>> print(x)
bingo

​ ArcGIS 中通过创建脚本工具,与GP框架结合的调用方法,是更适合ArcGIS用户的方法。以前写过 《在ArcGIS中创建Python工具(一)(二)(三)》几篇,点击链接可以近一步了解脚本工具。

0%