// build a function to take the map and platform objects as parameters functionHERERoute (map, platform, routeOptions) { // access the routing service by calling getRoutingService() var router = platform.getRoutingService(); // error handling var onSuccess = function(result) { console.log('Route found!', result); }; var onError = function(error) { console.error('Oh no! There was some communication error!', error); } router.calculateRoute(routeOptions, onSuccess, onError); }
var onSuccess = function (result) {

        // Option_1 Simply put the response to the console log
        console.log('Route found!', result);

        // Option_2 Furtherly draw the response to the map
        var route,
            routeShape,
            startPoint,
            endPoint,
            lineString;

        if (result.response.route) {

            // Just take the first Route in the array
            route = result.response.route[0];
            routeShape = route.shape;

            // H.geo.LineString is recommended, instead of H.geo.Strip in the offical demo code
            lineString = new H.geo.LineString();
            routeShape.forEach(function (point) {
                var parts = point.split(',');
                lineString.pushLatLngAlt(parts[0], parts[1]);
            });

            // Utilize H.map.Polyline to draw a blue line
            var routeLine = new H.map.Polyline(lineString, {
                style: {
                    strokeColor: 'blue',
                    lineWidth: 10
                }
            });
            map.addObject(routeLine);

            // update the map bounds to that of our route
            map.setViewBounds(routeLine.getBounds());
        }
    };
备注
原文写得早一些,示例代码中 H.geo.Strip类已经从 HERE Maps JS API v3.0.15.0 及之后弃用了,需要使用 H.geo.LineString 类来替换。详情点 这里 。
// a small helper which converts a location into a waypoint functionlocationToWaypointString(coordinates) { return'geo!' + coordinates.lat + ',' + coordinates.lng; }
// set a flag called RouteRendered // to ensure that the route is only rendered the first time var routeRendered = false;
var marker = new H.map.Marker(coordinates); map.addObject(marker);
// If the route has not been rendered yet, // calculate and render it if (!routeRendered) { var route = newHERERoute(map, platform, { mode: 'fastest;car', representation: 'display', waypoint0: locationToWaypointString(coordinates), waypoint1: locationToWaypointString(EndCoordinates) }); routeRendered = true; } }
// request the user's current location navigator.geolocation.watchPosition(updatePosition);
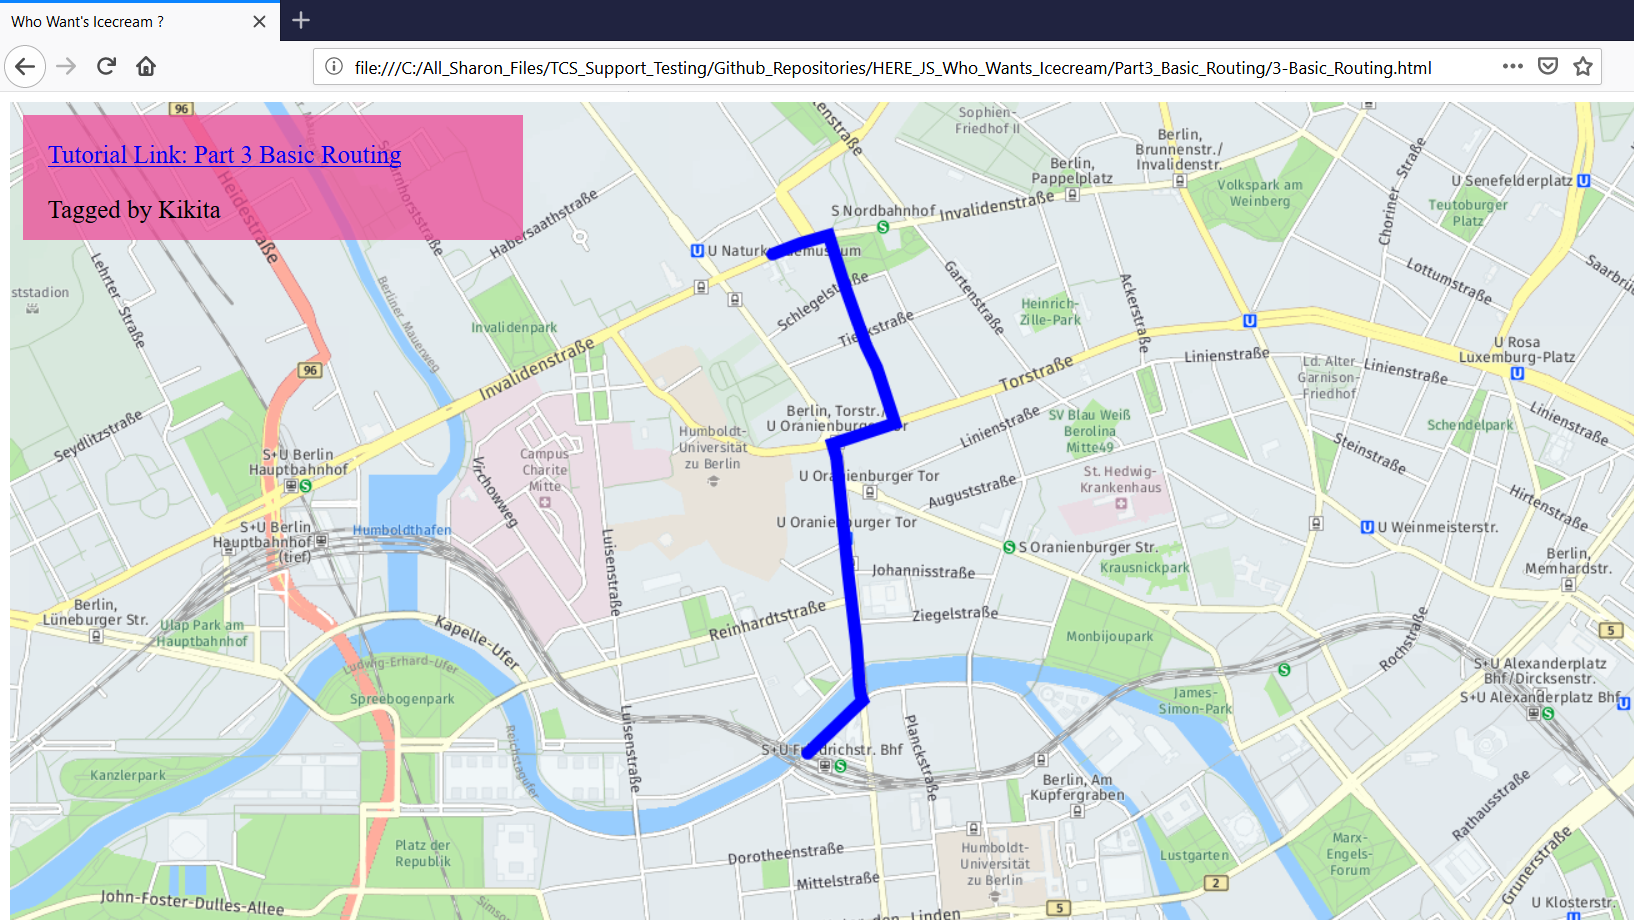
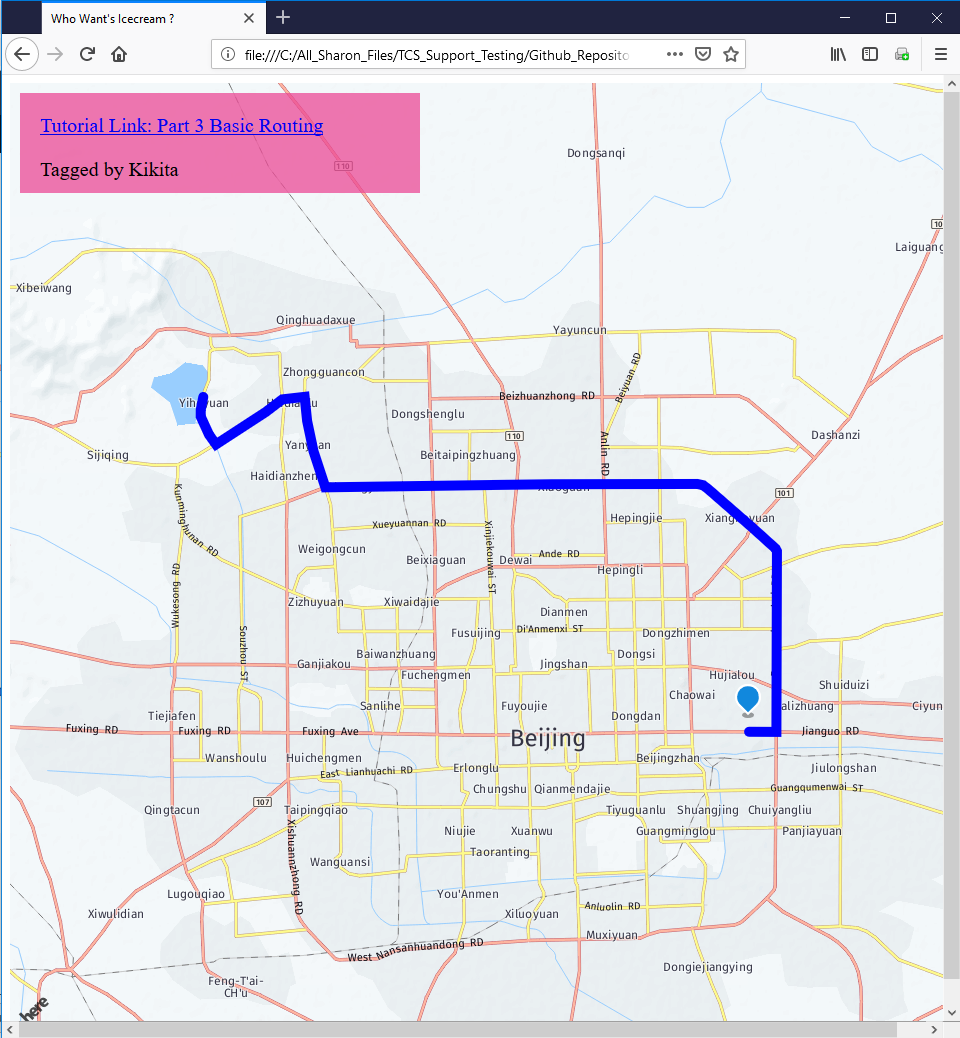
结果大概是这样:
由于相关法律的限制,HERE Developer 网站中提供免费试用的中国境内的 HERE 在线地图是非常粗略的等级(Entry Level),如下代码仅为了展示功能,并不为了较真位置的精确程度。
当然,精密级别的 China HERE Map 也已经上线了 ,并且有 China Spec HLS API 可供使用,只是没有默认包含在Global Freemium licenses 之中。如果需要试用评估或购买,需要通过 商务途径;也可以留言我,我也愿意帮助联系。